
This project began in 2006 in a small upstairs apartment on Seymour Street in Muncie, Indiana. Citrus Brown and I had returned home from a night out socializing at the Fickle Peach and after settling in, began to look for something to do that didn’t involve going back outside or spending money. Citrus, true to his nature, found a bone to chew on, leaving me to fend for my own entertainment.
It didn’t take long for me to notice a stripped down tattoo machine frame that had been on the work bench awaiting a rebuild. It was one of the first machines I had acquired; a Jonesy rip off from a tattoo supply warehouse that was popular in the 1990’s. The frame was originally a raw steel alloy with no coating or paint. After a thorough cleaning and drying, I pushed some candle wax into the threaded holes of the frame to preserve their functionality after the paint job I was about to apply. Within minutes, I had a can of bright yellow spray paint on hand and carefully hanged the frame from a light fixture by a wire coat hanger. Two coats of paint later, this machine project would be put on hold for some time as I had more pressing issues to attend to.
I wasn’t happy with the paint job I had applied; there were a few fish eyes and after careful evaluation I determined that I could have done a better job. My original intention was to sand it down and repaint the frame. It sat in a toolbox drawer until last Tuesday evening, waiting for my attention to fall back upon it.
Any Tuesday in December at most studios I have worked in is usually a slow day and last Tuesday was no exception. Two hours before closing time, I found myself wanting a fast project that didn’t involve spending money. As I pulled open the top drawer on my toolbox, I noticed the old yellow frame sitting among other frames and machine parts I had collected over the years. Suddenly the coating of yellow didn’t look as bad as I had remembered. I decided to use it without repainting, although time spent bopping around a drawer full of other metal frames had added a few scratches. If I could make it run smoothly before time to lock the studio for the evening, the Earl Scheib paint job wouldn’t bother me.
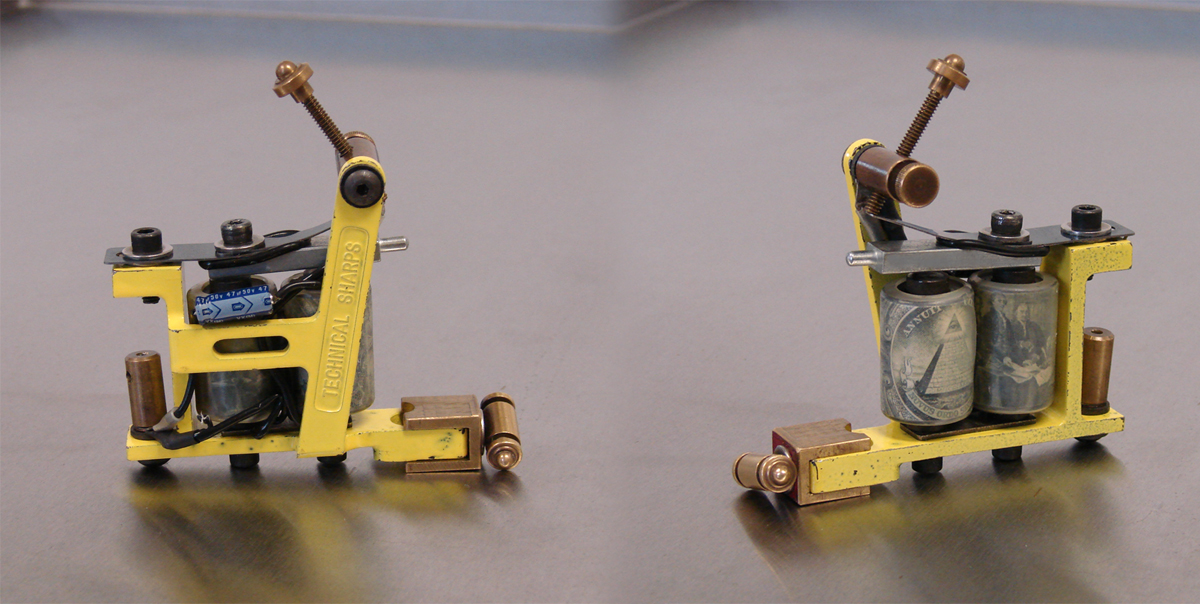
In minutes, I had all the parts I would need gathered on the work bench and carefully removed the wax from the threaded holes of the frame. I keep binding post insulators on hand in a 35mm film canister and dumped four of them out to use. The binding posts I would use were a set that I had obtained some time ago, for which machine I can’t remember. I selected them from the others available because they were brass; I wanted all the hardware to match the tube vice I would install. A set of coils with U.S. dollar wraps had been hanging out in my parts drawer since being removed from a knock off dial frame bought from a traveling salesperson passing through Muncie years previous. They were the correct height for the frame, 3.5 cm cores, so they were enlisted to become the magnetic powerhouse that would drive small round needle groupings into the skin of my clients. Beneath the coils I placed a thin steel yoke. The yoke is unnecessary on a frame constructed of ferrous metal but I installed it anyway as a matter of personal preference.
When building tattoo machines, I wire the capacitor independently from the coils. It is the intelligent way to approach wiring; if the capacitor fails, one only needs to replace that component instead of the whole electrical system of the machine. On this occasion, I installed a 47μF 50v capacitor because I intend to use the machine to drive small round needle groups, commonly known as “liners” or “rounds”.
The armature bar I selected fit perfectly at 4.5 cm in length and a weight of 13.5 grams. I normally cut my own springs from blue spring stock or feeler gauge but I was racing the clock and chose to use commercially available prefabricated springs I had on hand. They are blue spring stock and both front and rear are 19 gauge. After attachment to the bar and careful alignment, I tightened the small screw that completed the armature assembly. Then I selected a small rubber o-ring and stretched it between the front spring and the armature bar. This step isn’t necessary but it does make for a smoother cycle as the front spring is stabilized by the o-ring, effectively reducing chatter. I always use a drilled hollow screw to attach the rear spring to the deck so I selected one of the proper length for the frame and put it to use.
The frame originally had an outdated and often frustrating to use chuck style tube vice. It is a small metal collar chuck that can be tightened or loosened with a key style set screw that sticks out the front of the machine frame. They are a total pain in the ass to use and I had removed the collar years ago in anticipation of the rebuild that was now underway. The grandfather of a friend I worked with in Muncie was a skilled machinist and had produced for me a small brass piece in the shape I needed to make a superior functioning tube vice using the original threaded hole in the front of the frame. I selected a vice key screw to complete that part of the assembly and set about to plug the clip cord in and fine tune the machine.
Upon pressing the foot switch, the machine hummed quietly without producing sparks, a good indicator that there were no shorts in the circuit and the capacitor was working as expected. I turned the rheostat on the DC converter box slowly up to 9.25 volts, a good starting point for the tuning process on this particular machine. Adjusting the angle and height of the contact screw, I worked carefully to find the combination that provided the amount of throw I prefer with sufficient power to drive the needle groups I intend to use with the machine.
The project was finally finished! The following day, my first appointment required the use of a tight round needle group so I was able to test my results in the field. It worked beautifully; my lines were crisp, clean and consistent.
Adorn Your Corpse!
http://www.kingdavidstattoo.com
© David Rynes and King David’s Tattoo, 2014. Unauthorized use and/or duplication of this material without express and written permission from this blog’s author and/or owner is strictly prohibited.
